Hello everyone,
I know it has been a while since my last post. I apologize, I have just not had the time to get everything together and update everyone. Anyways, enough of that, lets get to the nitty-gritty or what I like to call the fun stuff..
Since my last post I have made significant changes to overhaul the database (for the better I hope) and threw together a python script that seems to work very nicely as an adapter between mochad and the sqlite database.
All of which is very much still in beta testing, but I will go over that in a bit.
To jump right in, the database changes involved a few things I felt would improve the system and make it work a little more automagically (yes, I just said that).
It is available here:
security
(you might want to rename it as I had to change it to a text file to upload it)
So one of the things I did was set up the paradigm in that when arming/disarming the alarm in different states you were essentially arming specific locations and types..
In the location table I added a column “armed_status” and sub_type. This allowed me to reference new tables “armstatus” and “locationsubtypes” to maintain database normalization.
Then to handle alarm modes I added table “currentalarmstatus” which is a single row table with 4 columns “current_mode”, “last_update”, “method”, “id” and this then references to another new table “alarmmodes” with 2 columns “alarm_mode_id” and “alarm_mode_name”. What I did then was create triggers that would automatically set “locations.arm_status” based on the “currentalarmstatus.currentmode”:
CREATE TRIGGER [disarmed_alarm]
AFTER UPDATE
ON [currentalarmstatus]
WHEN (NEW.current_mode = 0)
BEGIN
     UPDATE locations
     SET arm_status = 0
     WHERE locations.arm_status = 1;
END

CREATE TRIGGER [armed_away_alarm]
AFTER UPDATE
ON [currentalarmstatus]
WHEN (NEW.current_mode = 2)
BEGIN
     UPDATE locations
     SET arm_status = 1
     WHERE locations.arm_status = 0;
END

CREATE TRIGGER [armed_home_alarm]
AFTER UPDATE
ON [currentalarmstatus]
WHEN (NEW.current_mode = 1)
BEGIN
     UPDATE locations
     SET arm_status = 1
     WHERE locations.arm_status = 0 AND locations.sub_type != 2;
END

CREATE TRIGGER [NO_INSERT_ALLOWED]
BEFORE INSERT
ON [currentalarmstatus]
WHEN ((SELECT Count(*) FROM currentalarmstatus) > 0)
BEGIN
     SELECT RAISE(ABORT, 'No new records allowed on this table, updates only!');
END

CREATE TRIGGER [NO_DELETES_ALLOWED]
BEFORE DELETE
ON [currentalarmstatus]
WHEN ((SELECT Count(*) FROM currentalarmstatus) <= 1)
BEGIN
     SELECT RAISE(ABORT, 'No record deletions allowed on this table, updates only!');
END
While maybe not the most elegant way, this provided a means for the alarm status events to be handled by a single table update.
I also changed the sensor table, which broke the website query, so I will need to update that aswell..
Now for the python code, I threw together a python script which is available here:
mochadmon.py
This handles all mochad events coming across the port and acts as an adaptor to the database. This is still in it’s early stage and as you will see still needs some cleaning up/further development, however it does work.
You might also notice that I added some extra handlers in there for custom commands.
def process(r):
	# Prepare data and sanitize
	d = r.replace('\n', ' ').replace('\r', ' ').replace(';',' ').split(' ')
	# Standard Messaging Handling
	if len(d) > 5:
		datetime = d[0] + " " + d[1]
		direction = d[2]
		method = d[3]
		# Handler for Security
		if ( direction == 'Rx' or direction == 'Tx' ) and ( method == 'RFSEC' or method == 'HTTP' or method== 'CAMSEC' ):
			# this is a command for RF SECURITY
			if d[4] == 'Addr:':
				SensorID = d[5].upper()
			if len(d) > 6 and d[6] == 'Func:':
				SensorData = d[7].replace('_', ' ').split(' ')
				SensorName = SensorData[-1]
				SensorFunc = SensorData[0]
				SensorFuncUpper = SensorFunc.upper()
My idea was to have the single mochad port be the input for all of the security functions (arm/disarm, sensor input, etc..) That is why I added the “methodtype” and “id” to the “currentalarmstatus” table, to keep track of the user and method of the changes (sensor, web, etc..).
In a previous post I put together a quick hack that would allow me to use a ip security camera as a motion sensor, well I after messing further with mochad, it was not as simple as I previously thought so I will need to dig more into that (In the sourcecode, I did see that other ports were used for things like openremote and XMLSocket for the Chumby so those may provide avenues for me to handle this.)
I also started messing with building my own sensors.
To start, I have 2 arduino nano’s on a breadboard communicating with some cheap ask/fsk 433mhz radios.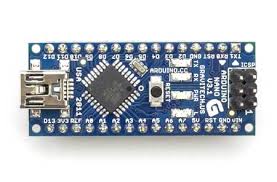
In my testing the radios seem to have ok range (better than the x10 sensors with the unmodified CM10A) but I have had issues with reliability.
I think it has something to do with the breadboard as when I wiggle the radio it will work and sometimes it won’t.
Anyways I am starting to get an idea of how to set the custom sensors up as I keep messing around. I also broke out my $20 USB Software Defined Radio and took a look at the x10 sensors and started looking at the messaging system.
I did come across someone that was using a teensy microcontroller to communicate with x10 rf, but I was not able to get it to work after porting his c code over to a arduino sketch.
So I am messing with Manchester encoding in the meantime.
I will try to update everyone on further progress sooner, thank you everyone for all the feedback I have received so far and keep it coming. If you have any suggestions and/or ideas feel free to comment below..
Go Back to Part 4 Intial Web Interface Development OR Continue to Part 6 Where I Continue Testing, Development and more on Web Interface (Coming Soon..)
(probing for heartbeat)
Just in case you are still busy or phasing off this project, I am wondering if you are willing to upload what you have to a location so that others can download, clean up, use, or modify what you have thus far. (I am willing to provide an owncloud upload folder if github is labor intensive at the moment)
Bugzy,
I appologize again, I have been working on this in my free time which has been a little limited lately, I will say I have created the github for this but I am currently working on a redesign on the whole project at the moment to address some of the issues I have come across. I will say I will be submitting everything as soon as possible to my github, and I will be following up on the project as soon as possible. Thank you for subscribing and being persistent to come back and follow up with me. Rest assured this is not a dead project and I am still very active;y working on it at the moment. I will keep you posted and be freely providing every access to all the code and project files once I get to a point where everything works.
Thank you again.
Thanks for the swift response. No need to apologize. Hope you are settling in well and having a good time in the new place. I look forward to your update.
any news on part 6 and upload of files to github? I have been checking the blog feverishly for about a month, and thought to ask about progress. You still have one eager fan
Bugzy,
Sorry, I have been really busy lately with moving into a new house. I will update this as soon as I get some time to finish up.
Thanks for following my project. I promise to have something soon for you.