So in my previous post I had a basic layout of some of the equipment I was going to use to begin testing and getting a environment conducive to getting things rolling on development..
So the next step was to get the basics started so I needed a server in order to have this all working and as mentioned in my previous post I was going to be utilizing a RaspberryPi as the central server, hence the name.

The first step was to choose a suitable OS. While there are many wonderful OS options to choose from with the Pi, I wanted something that I know was stable and well supported, so I went with Raspbian, which is a custom tailored Debian Wheezy image built for the Pi.
Instead of the complete image however, I decided to go with the RSE or Rasbian Server Edition. This package is the bare stripped down minimum which exactly meets my needs for a headless server. The developer [sirlagz] is a great developer and has done alot of work to get it stripped down to the minimum, so feel free to check out his site and show some love.
Now that I had the OS selected, all I needed to do was format an sd card and copy the data over.
I recommend using this guide as it is pretty detailed on getting it setup.
I used Win32DiskImager and it worked without a hitch. Follow the step by step instructions and you should be good to go. Another option that many people recommend is to use NOOBS which seems to be fairly straight forward.
Once the card was setup and ready to go, I inserted it into my RaspberryPi and plugged it into the network and boot it up. *Note (if you use another image such as the default Raspbian image you will need to use a monitor to enable ssh first. With Raspbian step A should help with that.)
Next you will need to get the ip address of the pi, in my case since I have nmap I used nmap -sP (network).0/24, but you should be able to also get it either through your routers admin screen, or from the pi itself with it plugged into a monitor.
Once it is up and you have the ip address, you should be able to ssh into it using an ssh program. On windows I use PuTTY you can use any ssh application you prefer. If you are on linux or mac just fire up terminal and ssh should be available on most distros.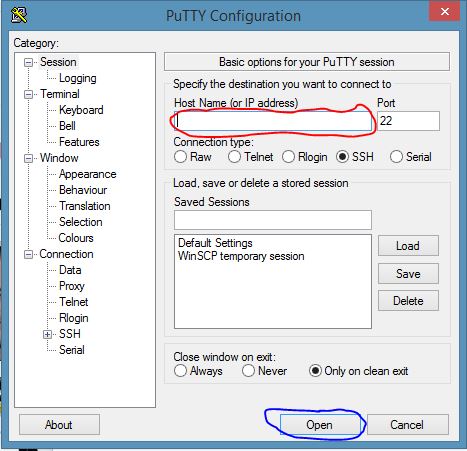
For Raspbian Server Edition (RSE) the default login credentials are:
username: pi
password: raspberry
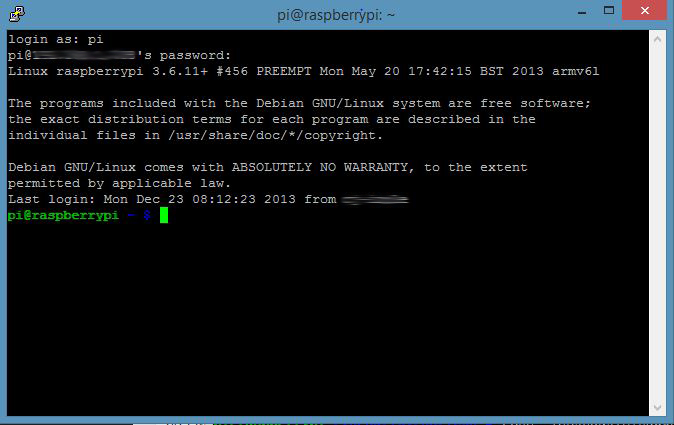
Once in you are in I recommend you do the following as I did:
A. Allocate more memory to cpu (as the video is not really important on a headless server) and expand root partition to fill SD card. (Raspbian)
run:
sudo raspi-config
This will run the config tool.
Depending on which version you have you will be presented with a screen similar as the one below:
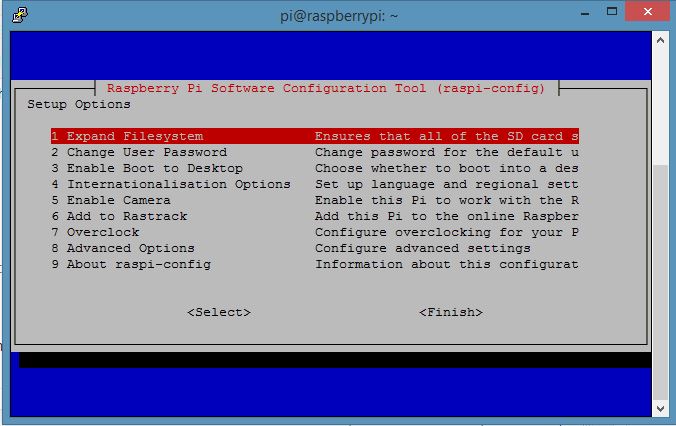
I ran the expand file system and then in the advanced options change the memory split so that the min memory is allocated to the video and maximum is set to cpu. You have many more options available here including overclocking and enabling and disabling various features, more documentation is available here. *Note (If you are using the default Raspbian image and not server edition you will also want to disable the desktop and enable ssh.)
B. Set a static ip address for the server.
The way I did this was the following:
sudo nano -w /etc/network/interfaces
change the eth0 line iface eth0 inet dhcp to the following (modify to match your home network setup):
======/etc/network/interfaces======
iface eth0 inet static ## This sets your Servers IP to Static
address 192.168.1.10 ## This is your Servers IP Address
netmask 255.255.255.0 ## This is your Servers Subnet mask
gateway 192.168.1.1 ## Network Gateway
======/etc/network/interfaces======
C. Create a local user, and put it in the users and sudo group:
sudo adduser YOURUSERIDHERE
sudo usermod -a -G users YOURUSERIDHERE
sudo usermod -a -G sudo YOURUSERIDHERE
D. Update the system to ensure that it has the latest and greatest copies of all the libraries:
sudo apt-get update; sudo apt-get upgrade
E. Reboot to make network changes take effect:
sudo reboot
Once it has rebooted you should be able to login with your new credentials..(once verified, it might be a good idea to change pi’s password so it is not a security risk. This can be done by either using: sudo raspi-config again or running: sudo passwd pi )
On my next installment I will discuss some of my initial testing and development.
Go Back to Part 1 Introduction OR Continue to Part 3 Where I get started on initial Testing and Development